How to Build Your Owl Page
Build your graphic novel page one step at a time. Keep your Page Plan next to you!
-
Step 1: Open the page templates
Press Make a copy, then change the name of your copy to your owl and your name.
Video coming soonPart 1: Layouts, title and pictures -
Step 2: Pick one layout
Look at the four layouts. Pick the one you like best. Every layout has six panels.
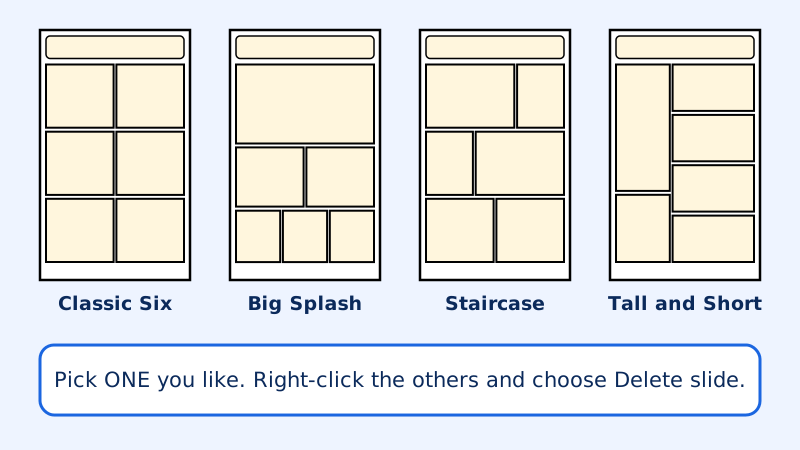
- Click a slide in the list on the left, right-click, and choose Delete slide for the ones you do not want.
- Want something different? The last slide is a blank page. Draw your own boxes with Insert, Shape, Rectangle.
-
Step 3: Add your title and name
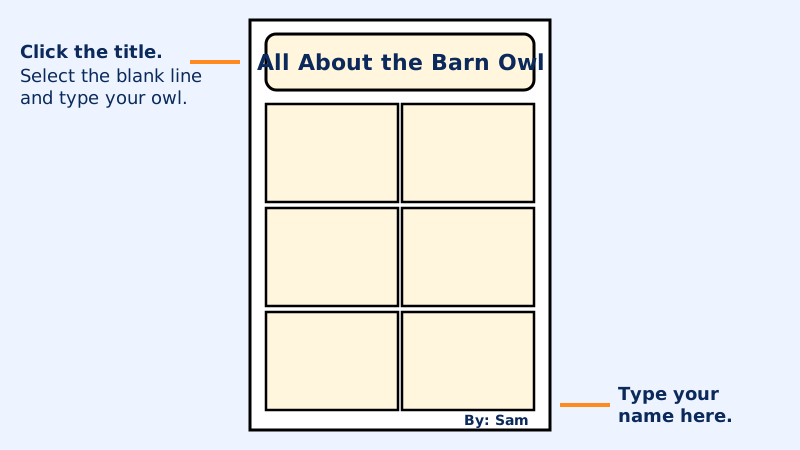
Click the title and type your owl’s name on the blank line. Then click By: and add your name.
-
Step 4: Add a picture to each panel
Copy a picture from your Picture Collection and paste it into your page. Drag it onto a panel and make it fit.
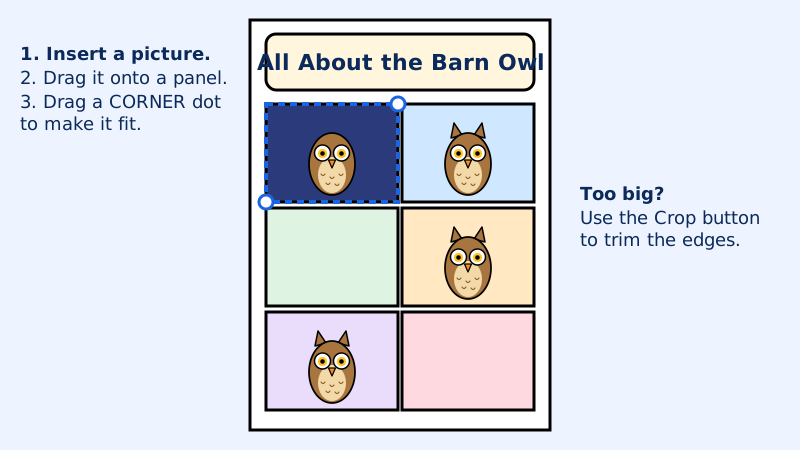
- In your Picture Collection, click a picture and press Control and C. In your page, press Control and V.
- Drag a corner dot to make it fit the panel. Use Crop to trim the edges.
- Leave a little room in each panel for a speech bubble.
Write where you found each picture in a small box at the bottom of the page, or keep it in your Picture Collection.
-
Step 5: Add a speech bubble
Your owl does the talking! Add a speech bubble to a panel and type the words from your Page Plan.
Video coming soonPart 2: Speech bubbles and fonts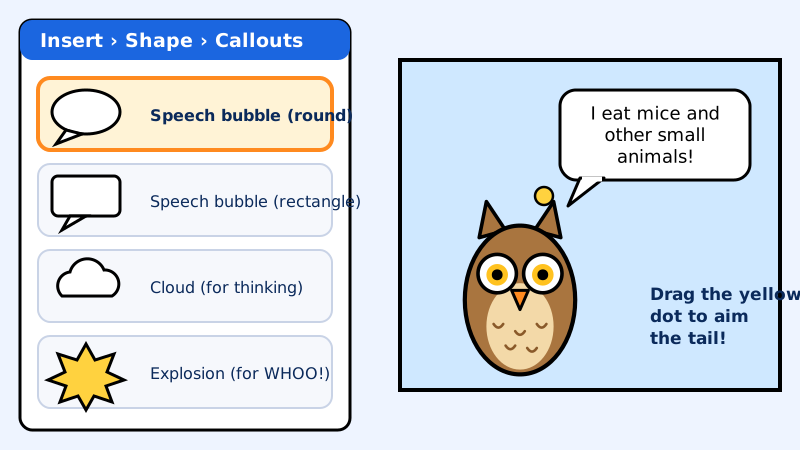
- Google Slides: Insert, then Shape, then Callouts, then a speech bubble.
- PowerPoint: Insert, then Shapes, then Callouts.
- Drag on the panel to draw it. Double-click inside it and type your words.
- Drag the yellow dot so the tail points at your owl.
Copy and paste a bubble to make the next one. All your bubbles will be the same style!
-
Step 6: Make your words fit
If the words do not fit, make the letters a little smaller or use fewer words. Fewer words is better!
- Click the bubble. Change the font size in the toolbar.
- Make the bubble bigger by dragging a corner dot.
- Read your bubble out loud. Is it short enough for an owl to say?
-
Step 7: Try a comic book font
Fonts are the shapes of letters. Choose one fun font for your title and one easy-to-read font for your speech bubbles.
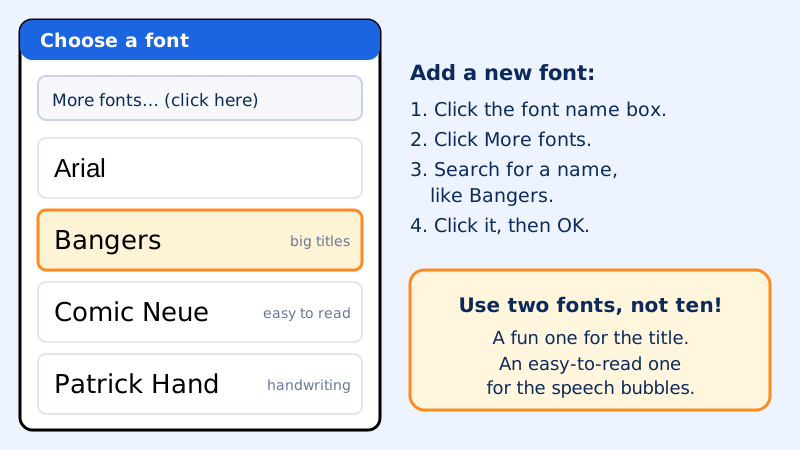
- Google Slides: click the font name box, then More fonts. Type a name like Bangers, Comic Neue or Patrick Hand and add it.
- PowerPoint: pick a fun font from the font list. Google Fonts are not in PowerPoint.
- Pick fonts that are big and easy to read when printed.
-
Step 8: Bonus: add a Whoo!
Comic books use big sound words like BOOM and POW. Add a WHOO! to your page.
- Insert, then Shape, then Callouts, then the Explosion or a star.
- Type WHOO! inside it. Make it bright and bold.
- Put it where your owl is hooting, but do not cover your owl’s face.
-
Step 9: Check your page and print
Use the checklist to check your page. The page is made to print on regular paper, 8½ by 11 inches.
Share your page with your teacher so it can be printed for the class book!
Grown-ups: how did this activity go? Send us feedback
For teachers
The build follows the way the project was taught in the lab: students choose a prepared layout, add pictures, then use shapes as speech bubbles to hold the facts. The templates are 8.5 by 11 so every page prints at the same size for the book. Videos for each part can be added to this folder (build-part1.mp4 and build-part2.mp4); until then each spot says Video coming soon.