

Lesson 3: Floating Object
Concepts: layers, keyframe, copy, paste in place, rotation tool, lasso, ordering of layers
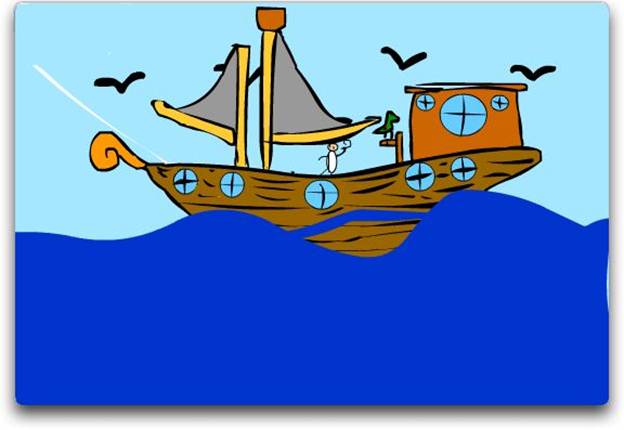
Your assignment is to draw a floating object bobbing in the water with birds flying across the sky.
Minimum technical requirements: 3 layers each with 4 frames. Layers must be labeled.
Create a new Flash document.
You will need three layers. Label them water, object, sky. First draw the first picture in the first frame in each layer. Now you have your design. To make the object appear to bob you need to make the object rock and the water go up and down, back and forth. Make sure the water line is somewhere through the object. Be sure you label your layers. You need a minimum of 4 frames in each layer.
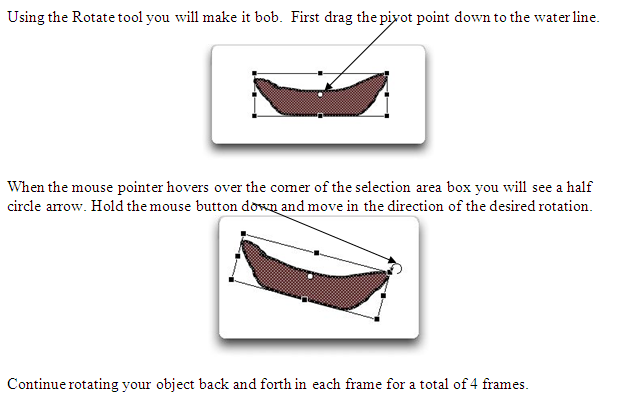
- Making the object bob: Lock and hide the water and sky layers. On the object layer, click on the second frame and insert a blank keyframe. Go back to frame 1, select the Object and copy it (EDIT/COPY), then go back to Frame 2 and paste it in place (EDIT/PASTE IN PLACE). (It probably will already be selected when you go back to it. Look for the tiny dots which means it is selected.)
- Making the water move: Lock and hide the sky and object layers. Insert a blank keyframe in frame two. Turn on onion skinning and redraw the water changing the surface lines. Continue this for a total of 4 frames.
- Putting birds or another object in the sky: Lock and hide the water and object layers. Draw very simple small birds, leaves, airplane, whatever in the sky. Again insert a blank keyframe into frame 2 and use onion skinning to redraw them by moving them forward a little on each frame. Continue for 4 frames.
You are ready to look at your movie. Unlock and Unhide all layers and click on play. Be sure to make it loop so it continues to bob. Is your object in front of the water? If so it will not look very natural. You can change this. Go to the layers, click on the water layer and drag it to a new position above the object layer. The fat gray line shows where the highlighted layer will go. Flash shows the top layer first, behind it the second layer, behind it the third layer, etc.

Save your file as “float”
Assessment:
Technical:
- Layers – used, labeled, order
- Pivot point
- Rotation tool
- Copy/past in place
- Four frames
- Saving
Quality:
- Realistic sense of movement of the water and bobbing of the object.
Back to the Introduction to Flash Contents