Lesson 6: Motion Tween Extras

Lesson 6: Moving Graphics Along a Path
Concepts: controlling motion of a tween by use of paths and orientation..
Assignment: Make an object follow a line.
Create a new Flash document. Make a short (10 to 20 frames) motion tween with a simple shape such as a circle or a square. Make the shape move from the top left hand corner to the bottom right hand corner.

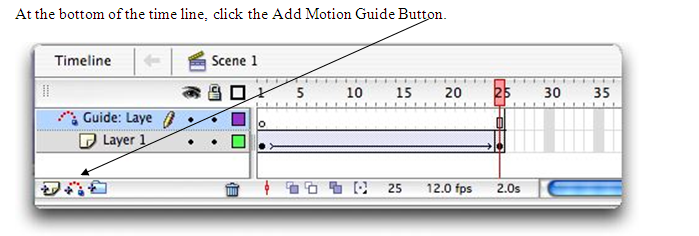
The above illustration shows what your layer and timeline should look like at this point.
With the Guide Layer selected, Use the pencil tool to draw a line on the Stage showing the path you want the graphic to take. In frame 1, make sure the shape is centered over the beginning of the line and in the last frame the last shape is centered over the end of the line.

Run your movie.
You can hide the line by clicking on the dot under the eye on the Guide Layer.
You can have multiple objects moving on multiple paths but they all must be on separate layers.
SAVE YOUR FILE AS “PATH”
Orienting an object to a line.

You can also change the speed of your tween by changing the ease. This can be found in the Properties Manager.
Save this project as “following”
Project One
Concepts: controlling motion of a tween by use of paths and orientation.
Assignment: Minimum requirements: 2 layers, background, moving object Save the file as “flight” |
Assessment:
Technical:
- Layers – use, number, labeled
- Path tween
Quality:
- Object flies realistically across the sky.
Project Two (Final Motion Tweening project)
Assignment: Minimum requirements: 4 layers, path tween, motion tween. Save file as “final motion”
|
Assessment:
Technical:
- Motion Tween
- Layers – use, number, labels
- Path tween
- Secondary Motion Tween
Quality:
- Effective use of tweens
Back to the Introduction to Flash Contents

