Animated Biomes: Learn the Scratch Concepts You Need
Using Coordinates to Move Your Sprites
 |
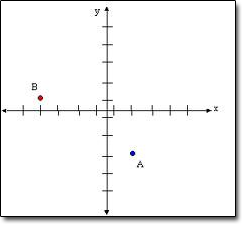
Computers always want a number for everything. Telling the computer where to put and move sprites all depends on a system called Cartesian Coordinates, where we can describe any point on the stage with two numbers. These two games will help you learn to use this system. |
Graph Mole: Help the farmer get rid of the moles that are eating all his crops! |
|
Looking for the Top Quark Game: This game is harder but very fun. If you've ever played Battleship, you know how to play this game. Your job is to hide your Quarks, then find the computer's before it finds yours! |
Create a Stage Background
The first step in creating your biome is to create the stage background on which all your sprites will be placed. Here are the steps:
- Find a good picture of your biome on the internet. Use the following guidelines:
- The picture should be larger than 480 pixels wide.
- It should have items for the animals and plants to be on. You need land for animals, trees or fenceposts for birds. Select carefully!
- Try not to have a real "busy" background.
- Save your picture to your Pictures folder.
Use the link below to learn how to create a background for your stage.
Creating Sprites from Imported Pictures
Your stage is all ready with a good background and you are ready to start creating your six sprites. First, you'll need to find a good picture of each plant or animal you are going to include in your animated biome. Think about how each will look and fit into the stage background as you look for pictures. As you find the pictures, save them into a folder in your Pictures folder so they are easy to find later.
Now you are ready to turn the pictures into sprites you can animate on the screen. Watch the tutorial below to find out how to do this.
Animate a Sprite
If you include a bird in your biome, it is much more fun to watch them flap their wings as they fly, or show an animals feet move as they walk. This section shows you how to do that using a tutorial created right in Scratch.
![]() Click here to learn how to animate a sprite in Scratch.
Click here to learn how to animate a sprite in Scratch.
When you've finished the tutorial, download the sample project to try the script out on your own. You can experiment to help you understand.
View this project on the Scratch website to see how it was created.
Move Your Animated Sprite on the Stage
You've got your sprite animated, but now how do you keep animating it while you move it across the stage naturally? The Glide block won't work -- the animation stops! Move to X Y just instantly moves your sprite to the location. That's OK if the sprite is Harry Potter, but what if it is just an ordinary Muggle? Watch the tutorial , created in Scratch, to learn how to do this.
![]() Click here to learn how to move your animated sprite in Scratch.
Click here to learn how to move your animated sprite in Scratch.
When you've watched the tutorial, download the sample file that you can open in Scratch and see the script and play around with it.
Want to see how the tutorial was made? Click HERE to open it in Scratch.
Create a Starting Point for Your Sprite
So, you've created your sprite, animated it, and moved it on the stage. It works perfectly the first time, but after that, it goes places you never wanted it to go! Time to learn how to control the starting point of your sprite.
![]() Watch the tutorial to see how.
Watch the tutorial to see how.
When you've watched the tutorial, download the sample file that you can open in Scratch and see the script and play around with it.
View this tutorial on the Scratch website to see how it was created.
Make Something Happen by Clicking On Your Sprite
The last bit of Scratch you'll need to learn is how to make things happen by clicking on a sprite on the stage. The tutorial below will show you how and let you practice making a "clickable sprite."
![]() Click here to learn how to make a "clickable sprite."
Click here to learn how to make a "clickable sprite."
It is always a good idea to have a Scratch program to use to experiment with this concept! Click here to open "Clickable Sprites" on the Scratch web site..

