
![]() Google Geography: Create a Placemark on a Collaborative Map
Google Geography: Create a Placemark on a Collaborative Map
You've looked. You've marveled. You've "traveled." But mostly you've consumed! Time to switch from consumer to creator and work with your classmates to add a placemark to a collaborative map.
We are going to work together to create a collaborative map where each person adds a placemark for the college or university at which you earned your highest degree. This is a project with great returns! For creating ONE entry, you get access to a map with MANY sources! That's the power of collaboration.
Each section below will give you the steps to accomplish the project in stages. You can just follow the written directions, or you can watch the very short video first and then follow the directions to complete each stage of the process. If you have room on your screen, it is easiest to keep the directions open in one window and your map in another and place them side by side on the screen.
![]() Watch the video to get a broad overview of the possibilities of My Places in Google Maps.
Watch the video to get a broad overview of the possibilities of My Places in Google Maps.
Access the Map
![]() Watch the video for this section.
Watch the video for this section.
- Make sure you are logged in to your Google account. Look in the upper right corner to check.
- Click this link to visit the "Where I Graduated from College" map.
- Click the Save to My Places link above the map title.
- Your map should now appear in your My Places section. You'll always be able to find the map here until you delete it.
- Click the My Places button to view only YOUR maps.
Search for Your College & Create the Placemark
![]() Watch the video for this section.
Watch the video for this section.
Depending on when you reach this step, there may already be placemarks created on the map. Ignore them for now, and follow these steps to create your own placemark.
- Make sure you are on the Where I Graduated from College Map. Click the red EDIT button above the title.
- Search for your college or university.
- Zoom in close enough that you know exactly where you want to drop your placemark.
- Click on the blue balloon in the tools area to PICK UP a placemark. Don't double click!! Click just ONCE to pick it up.
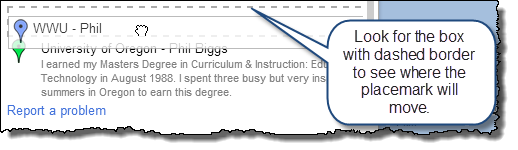
- Now move your mouse to the place you want to drop the placemark (notice it follows your movement). Watch the 'X' -- this is where the placemark will land.
- When the 'X' is where you want the placemark, click again to DROP the placemark in place.
Alternate directions for newer web browsers:
- Make sure you are on the Where I Graduated from College Map. Click the red EDIT button above the title.
- Search for your college or university.
- Zoom in close enough that you know exactly where you want to drop your placemark.
- Right click in the spot on the map where you want to add a placemark and choose Add a Placemark from the popup menu.
- The Placemark is created and placed on the map instantly!
You are now ready to add content to your placemark.
Add Text to Your Placemark
![]() Watch the video for this section.
Watch the video for this section.
Let's add the written content to our placemark first. Then we can position other media around it.
- Type in the title of the placemark in the box to the right of Title. To make it easy for others, type in the name of the university or college, a hyphen, then your name.
- To use the full text editor, click on the Rich Text link in the Placemark editor. You'll see a nice little text editing toolbar appear that will allow you to set fonts, style, color, etc.
- Now type in your text in the box under the toolbar. Format it appropriate to make it easy to read.
- Press enter a couple of time to open space for a picture (coming in the next section) and then add a link to your university or college's web page on a separate line at the bottom.
- To add a link, first type in the text. Something like "Click to visit <college> home page."
- Select the text you just typed.
- Click the Link button in the toolbar.
- Type the university or college's URL in the box that opens (or copy and paste the URL for error free links!).
Google Maps doesn't save changes in a placemark until you Click OK in the bottom of the placemark window. Do that now so we don't accidentally lose all the work we've done so far. We'll open it back up when we start the next section.
Add Picture to Your Placemark
![]() Watch the video for this section.
Watch the video for this section.
Now that we have written our description, we'll add a picture to the placemark.
- Using a search engine, find the picture of your choice. For best results, find a smaller picture. You can find the size of the picture when you roll the mouse over it. In Google Search, you can click on Search Tools --> then select Medium under the size option.
- DO NOT COPY THE THUMBNAIL on the search results page. Instead, click on the picture.
- The page with the picture will open with a copy of the picture opened in the foreground. RIGHT-CLICK on the picture and then select Copy image URL. We don't want to copy the picture, we want to copy the link TO the picture. (For an explanation of this, click here)
- Now return to your map placemark and click on the Insert Image tool.
- Position the INSERTION POINT at the place you want the picture to appear. I suggest after your main text and before the hyperlink.
- Click on the Insert Image button in the toolbar.
- Immediately paste the URL. Using CTRL-V is best, but you can also right click in the URL box and select paste. (NOTE: Be sure you don't have the "http://" in the area twice.)
- Click OK and your picture will appear in the placemark at the point the insertion point was blinking. Notice that Google Maps automatically resizes your picture to fit in the placemark for you.
This is a good time to save your work. Click OK at the bottom of the Placemark to save and close it.
Add Video to Your Placemark
![]() Watch the video for this section.
Watch the video for this section.
You can add video to your placemark as well. It takes a little bit more work than a picture, but can add a LOT to the experience!
- YouTube videos always work. If you want your video to work for sure, upload it to youTube! So, the first step is to find a video in YouTube and navigate to that video's page.
- Click the EMBED button under the video.
- Copy ALL the text that appears in the box that will open when you click EMBED.
- Go back to your map placemark. Make sure you are in Edit mode.
- Select EDIT HTML in the text editor.

- Click to set the insertion point in the spot you want your video to appear.
- Right-click and paste the text you copied from the YouTube page.
- Click OK to save.
- Click Done to exit Edit mode and enjoy your video.
Saving and Viewing Your Placemarks
When you have finished creating placemarks and would like to see how they look on the map:
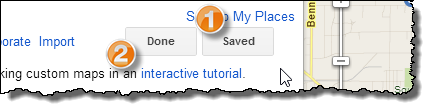
- click Save (watch for it to change to Saved to confirm),
- click Done.
To view the finished placemark, either find it in the list on the left and click on it, or you can just click on it on the map.
Re-order Your Placemarks
You can change the order of the placemarks in the listing on the left side of the map by simply dragging them to the place you want and dropping them. This is especially useful if you are telling a story in chronological order or creating an historical or novel study!